
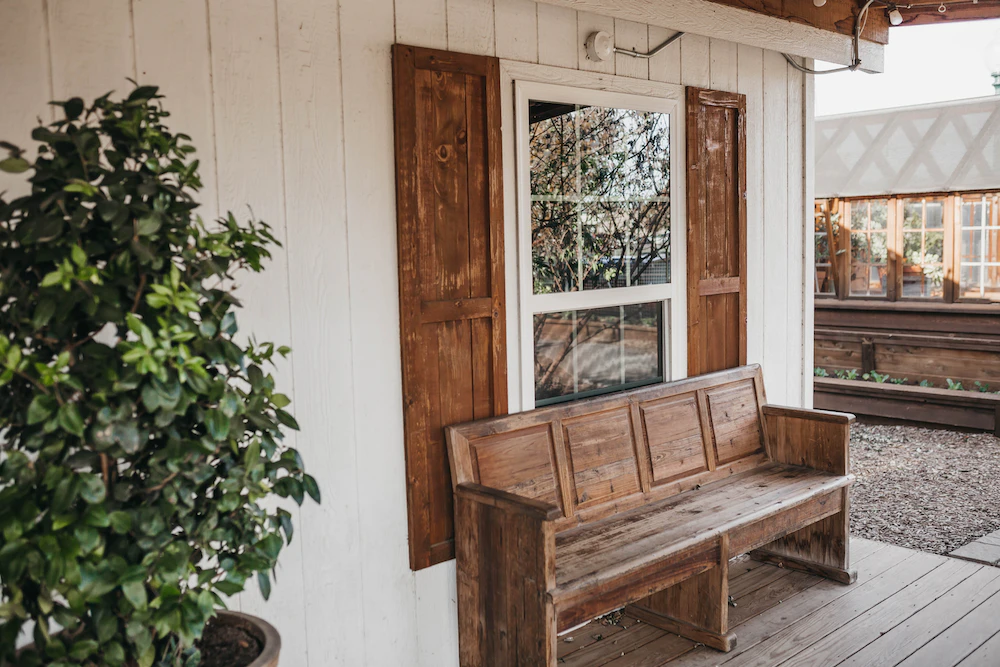
Master the Art of DIY: A Step-by-Step Guide to Crafting a Multi-Tasking Wood Bench
Woodworking has always been a passion of mine. There’s something incredibly satisfying about taking a pile of lumber and transforming it into a functional piece of furniture. If you’ve ever wanted to try your hand at DIY woodworking projects, building a wood bench is a great place to start. Not only will you have a beautiful and practical addition to your home, but you’ll also develop valuable skills along the way.
Benefits of crafting your own furniture
Crafting your own furniture has numerous benefits. First and foremost, it allows you to express your creativity and personalize your space. Instead of settling for mass-produced pieces, you can design and build furniture that perfectly fits your style and needs. Additionally, building your own furniture can save you money. While the initial investment in tools and materials may seem daunting, the long-term savings are worth it. Lastly, DIY woodworking projects are a great way to develop new skills and gain a sense of accomplishment. Taking on a project like building a wood bench will teach you valuable lessons in craftsmanship, problem-solving, and attention to detail.
Here you Can Download FREE EBook “Woodworking Mastery 2024”
Tools and materials needed for building a wood bench
Before you dive into your woodworking project, it’s important to gather all the necessary tools and materials. Here’s a list of what you’ll need to build a wood bench:
- Measuring and marking tools: A tape measure, combination square, and marking gauge will help you accurately measure and mark your lumber.
- Cutting tools: A circular saw or table saw will be essential for cutting the lumber to size. A miter saw or hand saw can also come in handy for making angled cuts.
- Joinery tools: Depending on the design of your wood bench, you may need a pocket hole jig, chisels, or a biscuit joiner for creating strong and secure joints.
- Assembly tools: A drill/driver, screws, clamps, and a rubber mallet will be necessary for assembling your wood bench.
- Finishing tools: Sandpaper, a random orbital sander, and a paintbrush or foam roller will be needed for sanding and applying a finish to your bench.
- Materials: You’ll need a variety of lumber, such as pine, oak, or maple, depending on your preference. Additionally, screws, wood glue, and a finish (such as stain or paint) will be required to complete your wood bench.
Step-by-step guide to building a wood bench
Now that you have all your tools and materials ready, let’s dive into the step-by-step process of building a wood bench. Follow these instructions carefully, and you’ll have a beautiful piece of furniture in no time.
Step 1: Design and planning
Start by deciding on the design and dimensions of your wood bench. Consider the purpose of the bench and the space where it will be placed. Sketch out your design and make a list of the necessary measurements and materials.
Step 2: Prepare the lumber
Measure and mark the lumber according to your design. Use a saw to cut the pieces to the desired lengths. Take your time and ensure accurate cuts.
Step 3: Create the bench frame
Begin by assembling the frame of the bench. Use your joinery tools to create strong and secure joints. Double-check that everything is square and level before moving on.
Step 4: Attach the seat and backrest
Attach the seat and backrest to the frame using screws and wood glue. Ensure everything is aligned properly and securely fastened.
Step 5: Sand and finish
Once the bench is fully assembled, it’s time to sand the surfaces smooth. Start with a coarse-grit sandpaper and gradually work your way up to a finer grit for a polished finish. Apply a finish of your choice, such as stain or paint, following the manufacturer’s instructions.
Step 6: Final touches
Inspect the bench for any imperfections or rough edges. Make any necessary adjustments and apply additional coats of finish if desired. Stand back and admire your handiwork!
Here you Can Download FREE EBook “Woodworking Mastery 2024”
Finishing touches and staining options
The finishing touches of your wood bench can greatly enhance its appearance and durability. Consider adding cushions or pillows for extra comfort and style. If you prefer a natural wood look, you can choose to leave your bench unfinished or apply a clear coat to protect the wood. Alternatively, staining your bench can add depth and character to the wood. There are various staining options available, such as oil-based stains, gel stains, or water-based stains. Experiment with different finishes to achieve the desired look for your wood bench.
Tips for maintaining and preserving your wood bench
To ensure your wood bench lasts for years to come, it’s important to properly maintain and preserve it. Here are some tips to keep your bench in top condition:
- Regular cleaning: Dust and wipe down your wood bench regularly to prevent dirt and grime buildup. Use a mild soap and water solution for deeper cleaning when needed.
- Avoid moisture: Keep your bench away from areas with excessive moisture, as it can cause the wood to warp or rot. If your bench is placed outdoors, consider applying a weather-resistant finish.
- Protect from direct sunlight: Prolonged exposure to direct sunlight can fade the color of your bench. Consider placing it in a shaded area or use a UV-resistant finish.
- Inspect for damage: Regularly inspect your wood bench for any signs of damage, such as loose joints or cracks. Repair any issues promptly to prevent further damage.
- Reapply finish: Over time, the finish on your bench may wear off. Depending on the type of finish used, you may need to reapply it every few years to maintain its protection and appearance.
Inspiration for customizing your wood bench
Building a wood bench provides endless opportunities for customization. Here are a few ideas to inspire you:
- Upholstered seat: Add a touch of luxury and comfort by upholstering the seat of your wood bench. Choose a fabric that complements your décor and staple it to a plywood base.
- Storage bench: Incorporate storage compartments within your bench by adding hinged lids or drawers. This is perfect for keeping blankets, shoes, or other items neatly tucked away.
- Personalized carvings: Use carving tools to add intricate designs or patterns to the surface of your bench. This will give it a unique and personalized touch.
- Mixed materials: Combine different materials, such as metal or leather, with the wood to create a contemporary and eye-catching design.
- Convertible bench: Make your wood bench multi-functional by adding a foldable or extendable mechanism. This allows it to transform into a table or accommodate additional seating when needed.
Safety precautions when working with wood
Working with wood can be enjoyable, but it’s important to prioritize safety. Here are some safety precautions to follow when undertaking DIY woodworking projects:
- Wear protective gear: Always wear safety goggles, ear protection, and a dust mask to protect your eyes, ears, and lungs from sawdust and debris.
- Use tools properly: Familiarize yourself with the proper use of each tool and follow the manufacturer’s instructions. Keep your tools clean and sharp for optimal performance.
- Work in a well-ventilated area: If working indoors, ensure proper ventilation to prevent the buildup of sawdust and harmful fumes from finishes or adhesives.
- Secure your workpiece: Use clamps or a vise to secure your workpiece firmly before cutting or drilling to prevent slips or movement.
- Take breaks: Woodworking can be physically demanding. Take regular breaks to prevent fatigue and maintain focus.
Here you Can Download FREE EBook “Woodworking Mastery 2024”
Resources for finding woodworking plans and designs
If you’re new to woodworking or need inspiration for your next project, there are plenty of resources available to help you find woodworking plans and designs. Here are a few:
- Online woodworking communities: Join online forums or social media groups dedicated to woodworking. These communities are a great source of information, advice, and project ideas.
- Woodworking magazines: Subscribe to woodworking magazines that offer project plans, tutorials, and tips from experienced woodworkers.
- Library books: Visit your local library and browse their collection of woodworking books. You’ll find a wealth of information and inspiration.
- Woodworking websites: Many websites offer free or paid woodworking plans and designs. Some popular ones include Ana White, Woodsmith, and Fine Woodworking.
Conclusion: Enjoy your new multi-tasking wood bench!
Building a wood bench is a rewarding and fulfilling DIY project. Not only will you have a beautiful and functional piece of furniture, but you’ll also gain valuable woodworking skills along the way. Remember to plan carefully, gather the necessary tools and materials, and follow the step-by-step guide. Don’t forget to add your personal touch and take proper safety precautions. Once your wood bench is complete, sit back, relax, and enjoy the fruits of your labor. Happy woodworking!